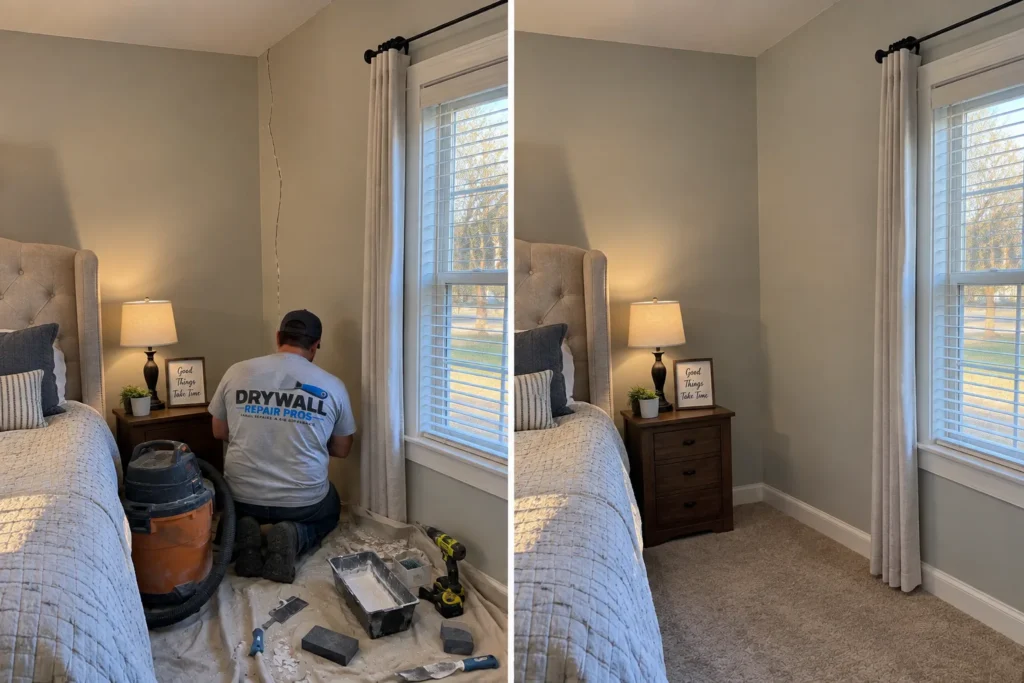
What Happens During a Drywall Repair?
The exact sequence depends on the damage, but most professional drywall repairs follow the same logic: define the problem, remove or stabilize failed material, rebuild the damaged area, finish the joints or surface, restore texture when included, and leave the repair ready for the agreed next step.
1. Scope the Repair
Photos, dimensions, location, damage history, wall-versus-ceiling information, texture, and the cause of the opening help establish the initial scope.
2. Confirm Other Work Is Complete
If a plumber, electrician, HVAC technician, roofer, window installer, or remodeler created or exposed the damage, their work should generally be complete before permanent drywall closure.
3. Protect the Work Area
Drywall finishing creates dust and compound residue. The protection needed depends on the room, repair size, ceiling height, furniture, flooring, and access.
4. Remove or Stabilize Failed Material
Loose paper, crumbling gypsum, failed compound, damaged tape, weak patch material, or compromised drywall may need to be removed back to a serviceable boundary.
5. Back, Patch or Replace the Damaged Section
Depending on the opening, the repair may require backing, a fitted drywall piece, fasteners, tape, or another appropriate patch method.
6. Apply and Feather Joint Compound
Compound is built in controlled layers so joints, fasteners, and transitions can be feathered into the surrounding surface. Drying requirements vary by material and conditions.
7. Sand and Inspect
The repair is smoothed and checked for ridges, depressions, rough edges, and visible transitions.
8. Restore Texture When Included
Texture is matched and blended according to the existing wall or ceiling finish and agreed scope.
9. Prepare for the Next Finish Step
The final handoff may be ready for primer/paint or another agreed finishing step. The exact painting scope should be confirmed with the estimate.
Start With Photos
Send photos of the damaged area, the property address, and a short description of what happened. Clear wide, medium, and close-up photos can often provide enough information to establish an initial repair scope without adding an unnecessary first visit.
What Changes the Repair Process
- Wall versus ceiling location
- Small hole versus larger cutout
- Crack versus failed joint or tape
- Water history
- Loose or sagging material
- Existing texture
- Previous repair attempts
- Ceiling height and access
- Number of repair areas
- Whether another trade still needs access
Drywall Repair After Other Trades
When plumbing, electrical, HVAC, window, door, flooring, trim, cabinet, or remodeling work creates the opening, sequencing matters. The underlying work should be complete before permanent closure. Photos showing the opening before it is patched can also provide useful context about backing, framing, utilities, and the repair boundary.
Frequently Asked Questions
How many coats of compound does drywall repair take?
The number and type of applications depend on the repair method, joint depth, material, drying conditions, and finish requirements.
Will drywall repair create dust?
Sanding and surface preparation can create dust, so protection and cleanup are part of planning the work area.
Does texture happen before painting?
Texture restoration, when included, is generally part of preparing the repaired surface before the final paint system.
Can several rooms be repaired in one project?
Yes. Label all repair locations in the estimate request so the complete scope can be reviewed.
What should happen before drywall is closed after trade work?
Confirm the underlying work is complete and the opening no longer needs access.